Keep Your Dogs Safe with a Mancave Garage Gate

Brittany and I have three amazing dogs. 2 of them are old boys (almost 13 yo) and we have our perpetual puppy Riley (3 yo). They love to be around us at all times, and we love to let them. One thing that bugged me when I started working from home was the fact that I was near them, but they could not be with me. This led to them scratching and barking at the door… all the time. I know we should have trained them better.. blah blah blah.

Rebel, Smore and Riley in the first Airstream we renovated (1971 Airstream Sovereign).
I wanted to find a solution to this problem which would allow them to be outside with me while I work on Airstreams. The old pups will sit in the garage all day unsupervised, but the little one, Riley, is a huge flight risk. It is something we have worked on, but he still randomly gets the urge to run as fast as he can down the street. Anyways, what to do?
I originally got the idea from our neighbors. They framed out the opening to their garage with a screen. It allows them to close off their garage turning it into a covered porch, basically, but also maintains their garage door functionality as well. At some point, it clicked in my dopey brain that I can build something to close off the garage without closing the door, but how?
Answer: build a simple gate that fits between the garage door tracks.

Boards cut and ready to routing.
Our garage door opening is 16ft wide. I decided to build 4-4ft sections to span the width. In total, I need 8-4ft sections and 8-3ft sections all with a mitered 45 degree end (as seen in the picture above). There are several options for securing the screen part to the frames once constructed and I was feeling fancy that day so I decided to rip a dado cut through my boards to secure the wire.

Router jig. Ugly but effective.

Dado cuts on the inside face of the wood.
I do not have a router table so I fashioned up a jig that would allow me to feed the boards through to get a nice dado cut. A dado cut is a shallow cut through a board that does not span the entire width of the board (as seen above). The process wasn’t pretty but the jig worked perfectly!

Assembly of the gate section. Definitely the most painstaking part, but also the finish line.
I purchased some wire from Home Depot that was exactly 3ft tall so I only had to cut the length I needed. Using some simple wire cutters, measure out the 4ft section and make your cuts. The tricky part was flattening the wire out enough to slide it in the dado cut grooves. I used a trim nail gun (15 gauge) to secure the boards together. Once I had the wire in the grooves, I secured the bottom board.

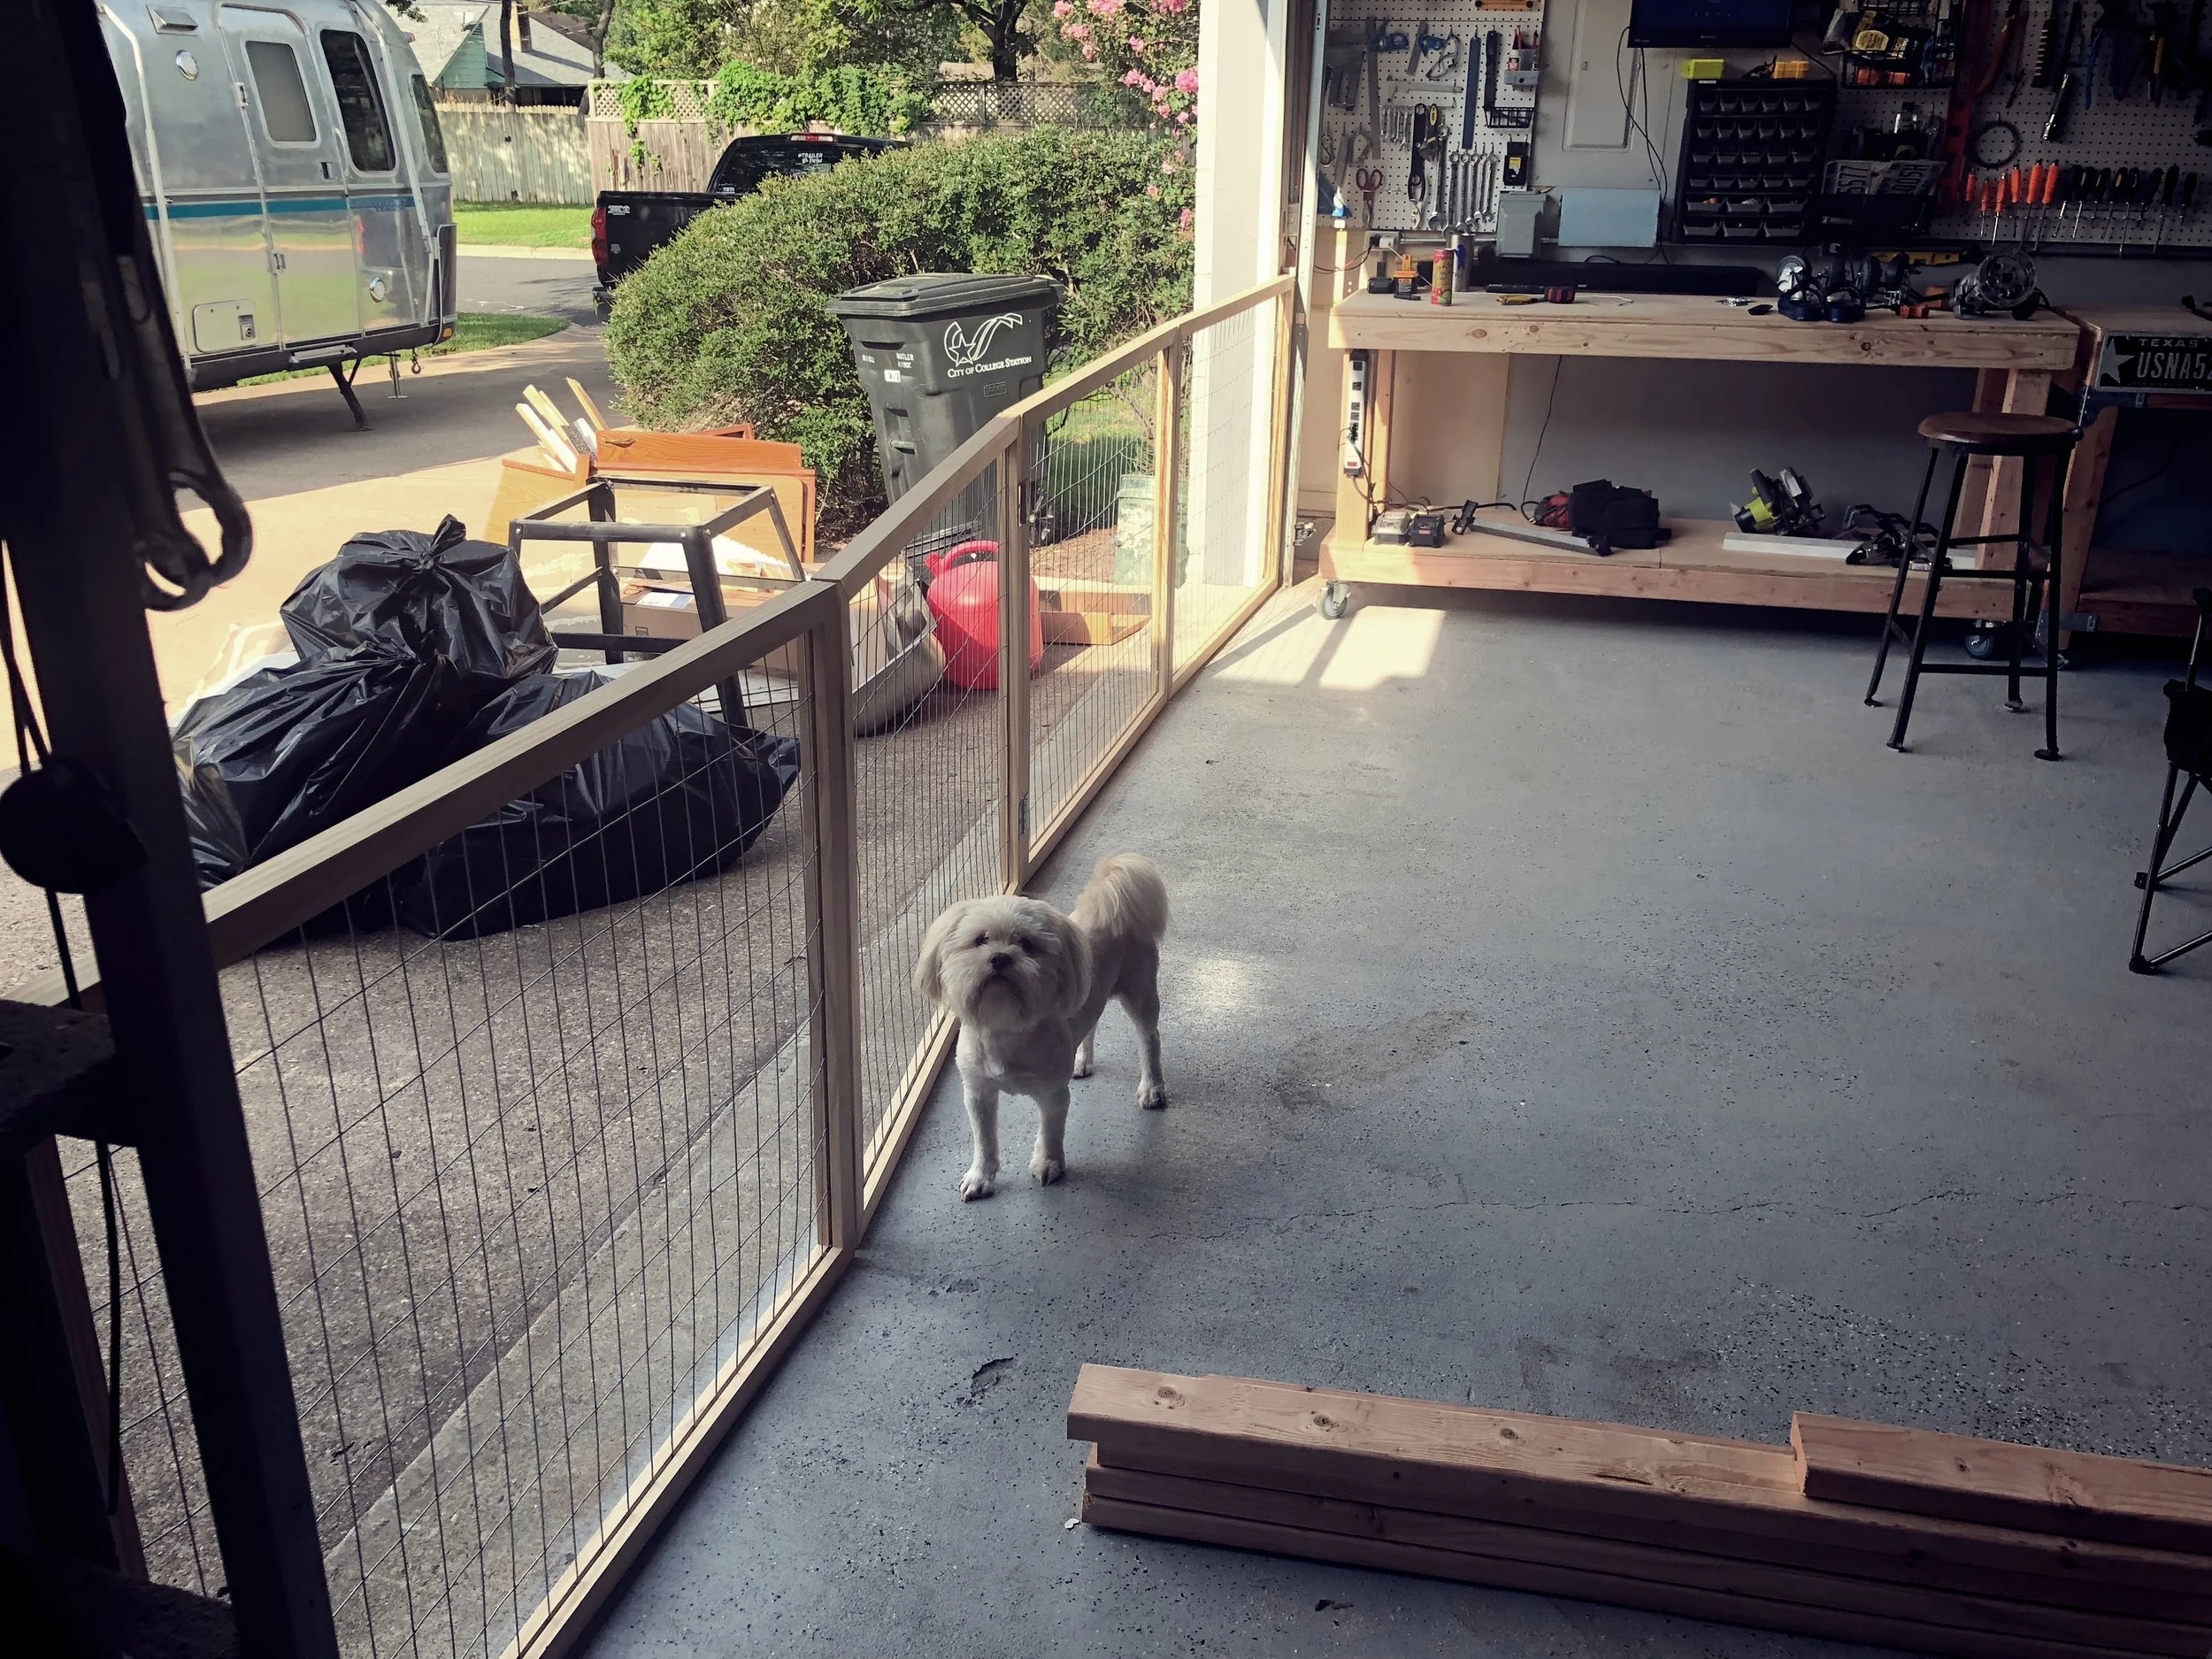
Testing out the first gate panel before starting the others.
Once I had all 4 panels assembled, I added hinges between them so I can fold it up and store it when not in use. Overall, this was an easy and fun project that has improved my quality of life tremendously. Now our dogs can stay outside with me all day and work on Airstreams. No more barking or scratching at our doors. They are super happy being outside with me as well. Moral of this story, if there is something in your life that frustrates you, fix it.